How to Easily Import Iphone Photos into Lightroom Classic (For Mac Users)
In this quick blog, I will show you how to move your iPhone photos into Lightroom Classic easily. There are lots of ways to do it, but I have found them all to be complicated. I have finally found an easy way.
As iPhone cameras improve, I now use my iPhone camera more often, especially since I can shoot RAW on my Phone. It is usually the RAW (and Jpegs) photos that I usually want to bring into Lightroom Classic to edit, and I like having all my photos in 1 place.
I am sure you can take the same steps on an Android but I just do not know how to do it.
Step 1: How to Turn on Raw Photo Mode on your iphone
First, you need to change a few things in your iPhone Settings to be able to shoot RAW. To do this, on your iPhone, go to Settings, then Scroll down to Camera.

Camera Settings
Click on Camera then open Formats
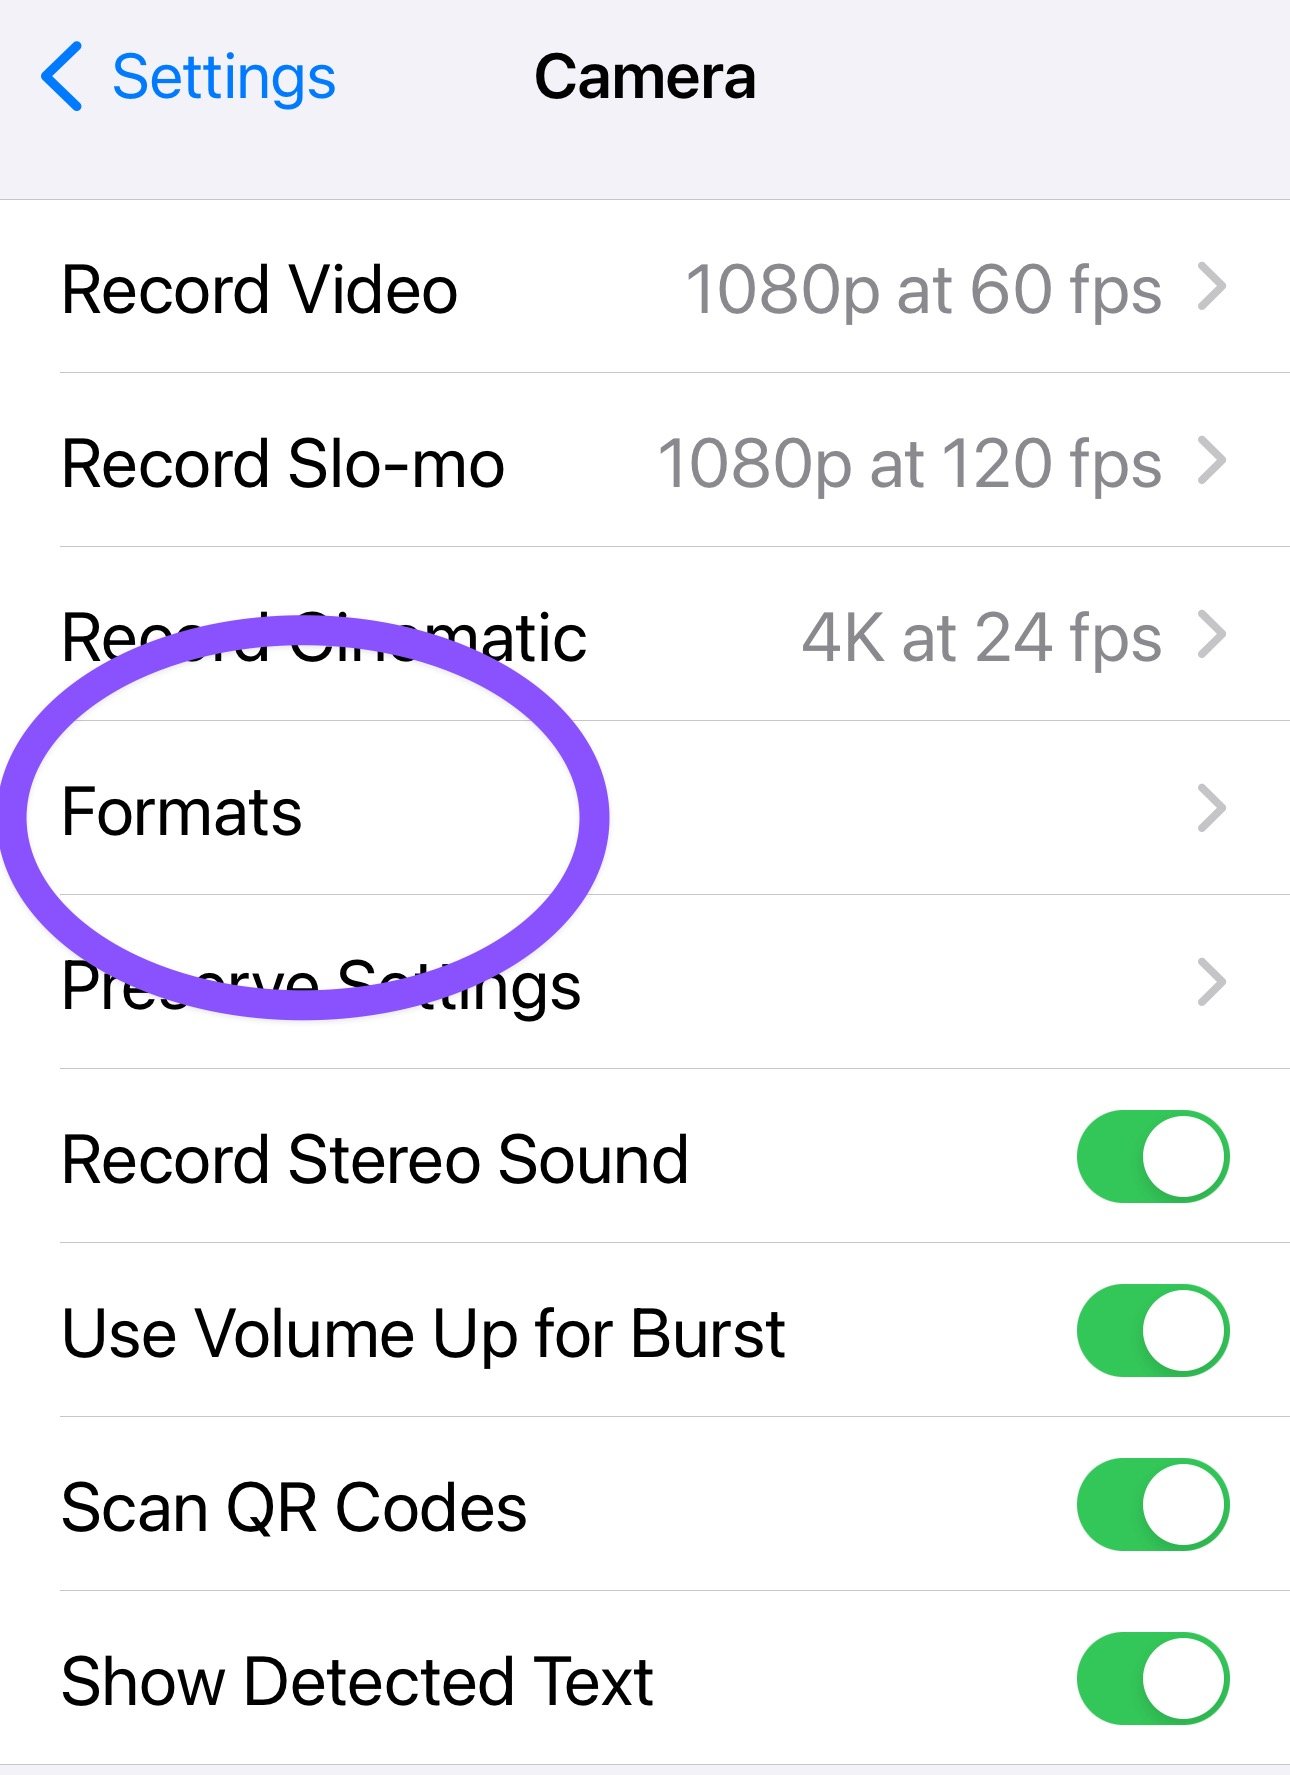
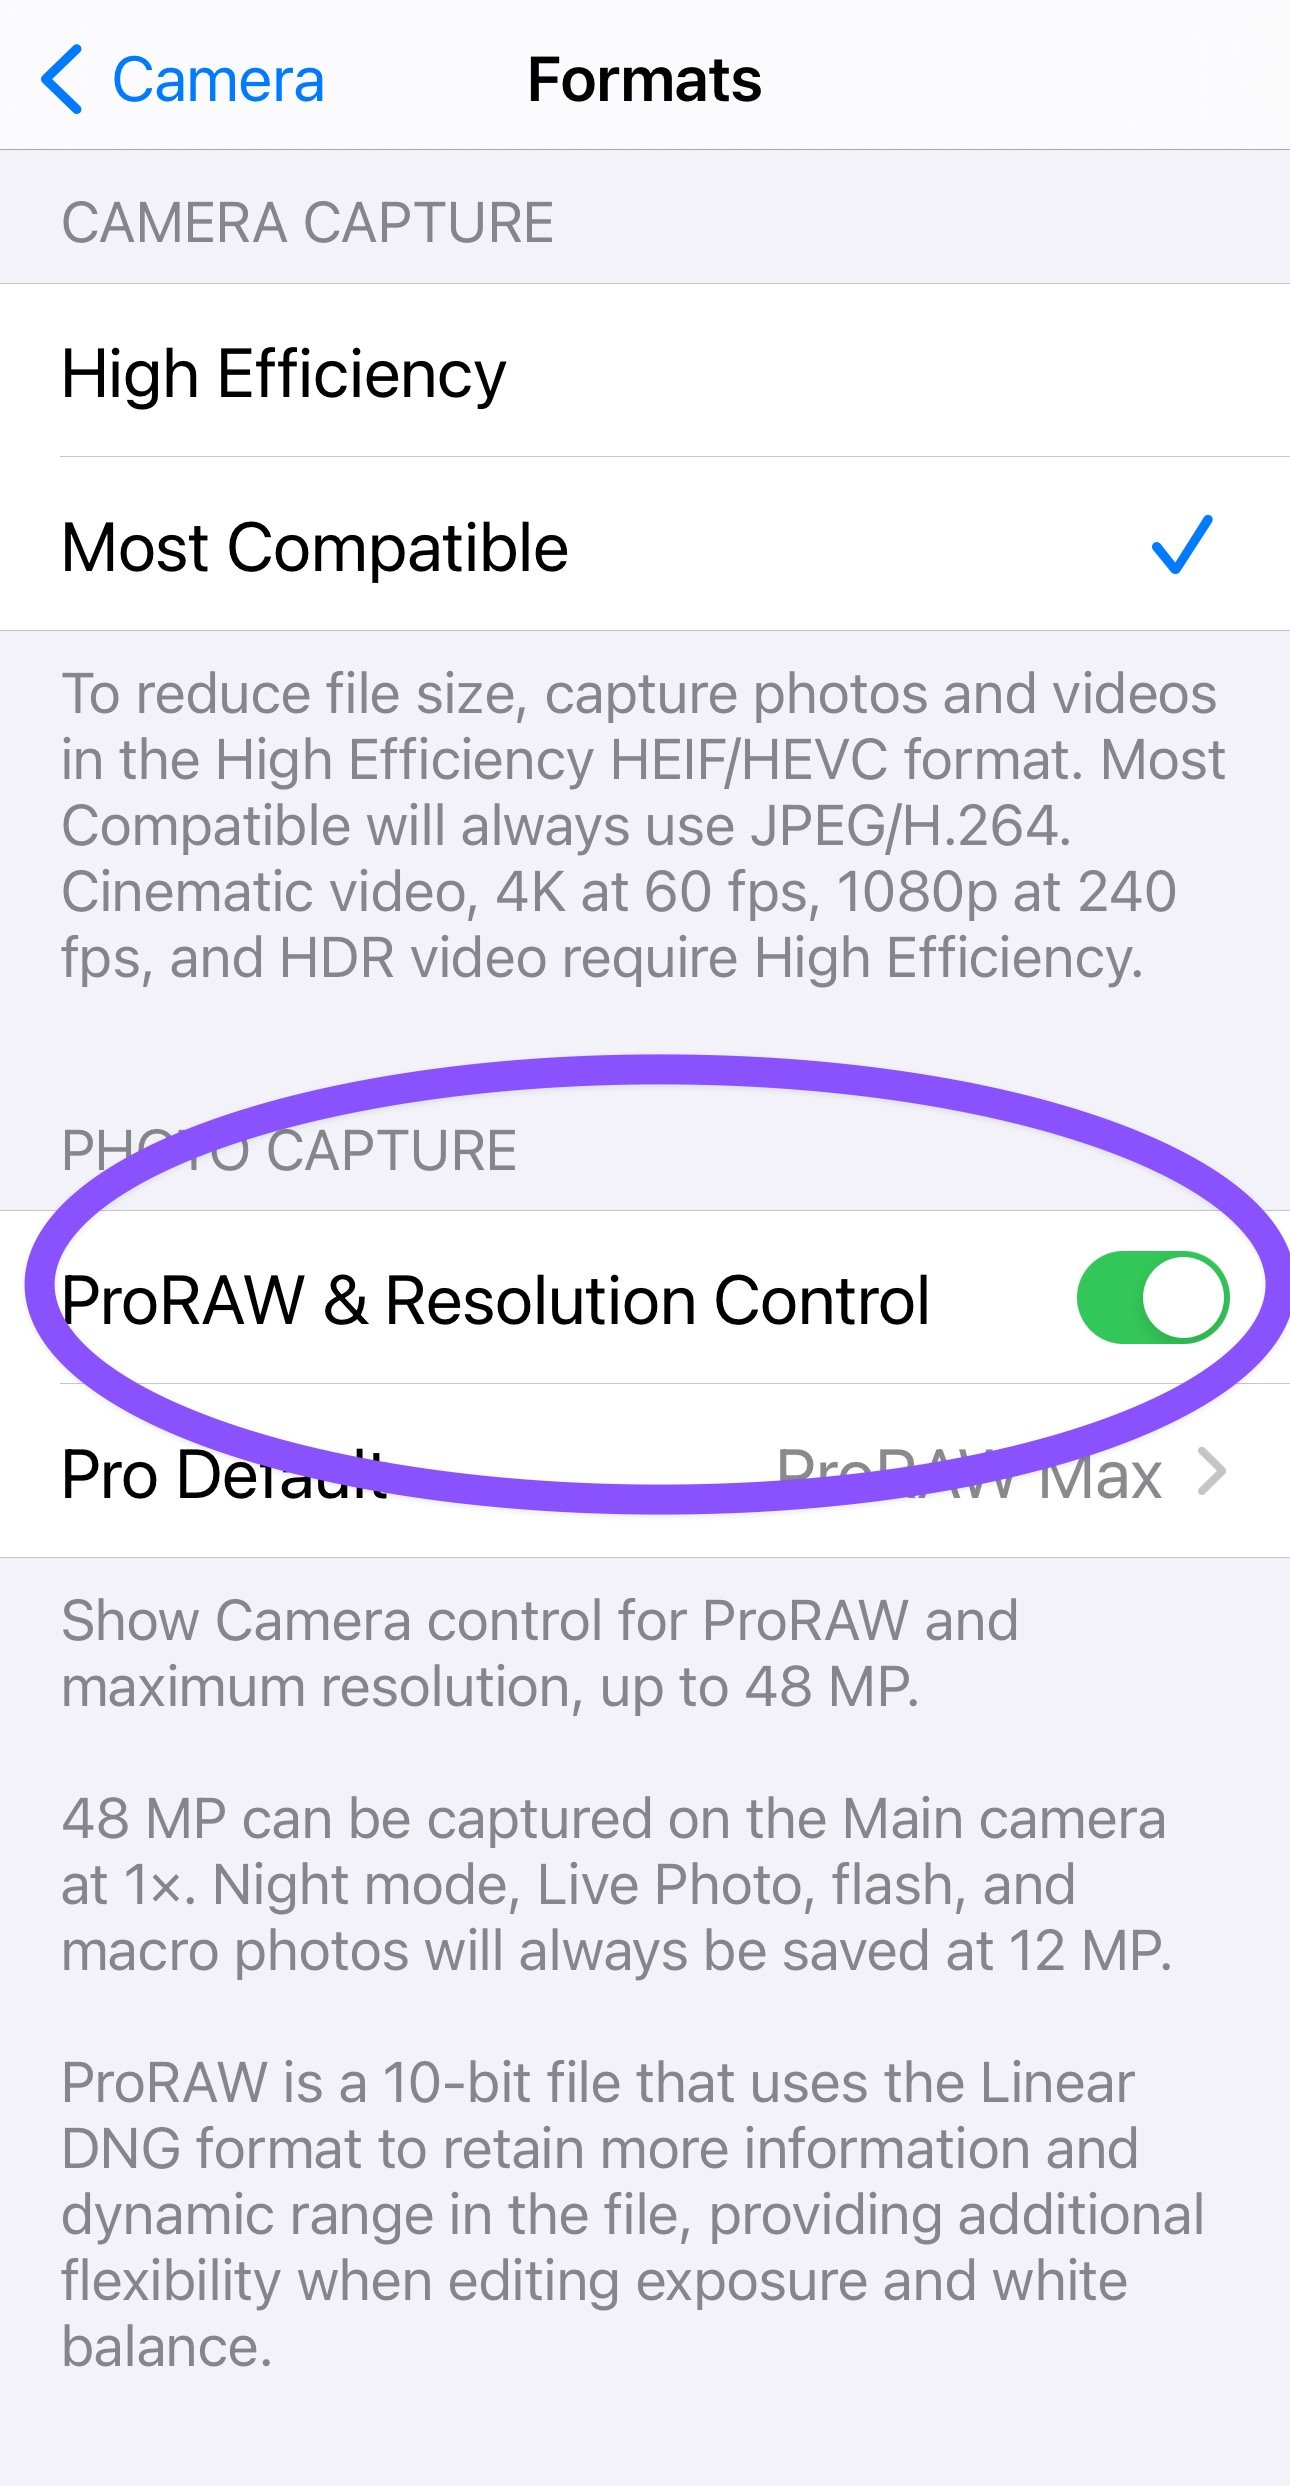
Toggle on Apple ProRAW & Resolution Control under Photo Capture. Now you can shoot RAW. Then open Pro Default to change the raw format options. I select PRORAW Max (up to 48 MP) for the best quality photo format.
You probably do not want to always shoot raw because the file sizes will quickly use up your camera storage. So, when you want to shoot raw, tap RAW MAX in the Camera app, then take your shot.
Step 2: Moving Photos to Lightroom Classic
From Photos on your Laptop/Desktop, locate the photos you want to export to Lightroom Classic. For example, let's say I want to export the photos below into Lightroom Classic. I would click and select the photos I want to export.

In Photos, I would go to File and Export Unmodified Originals. Using this setting, will allow you to export the RAW file instead of the JPEG.

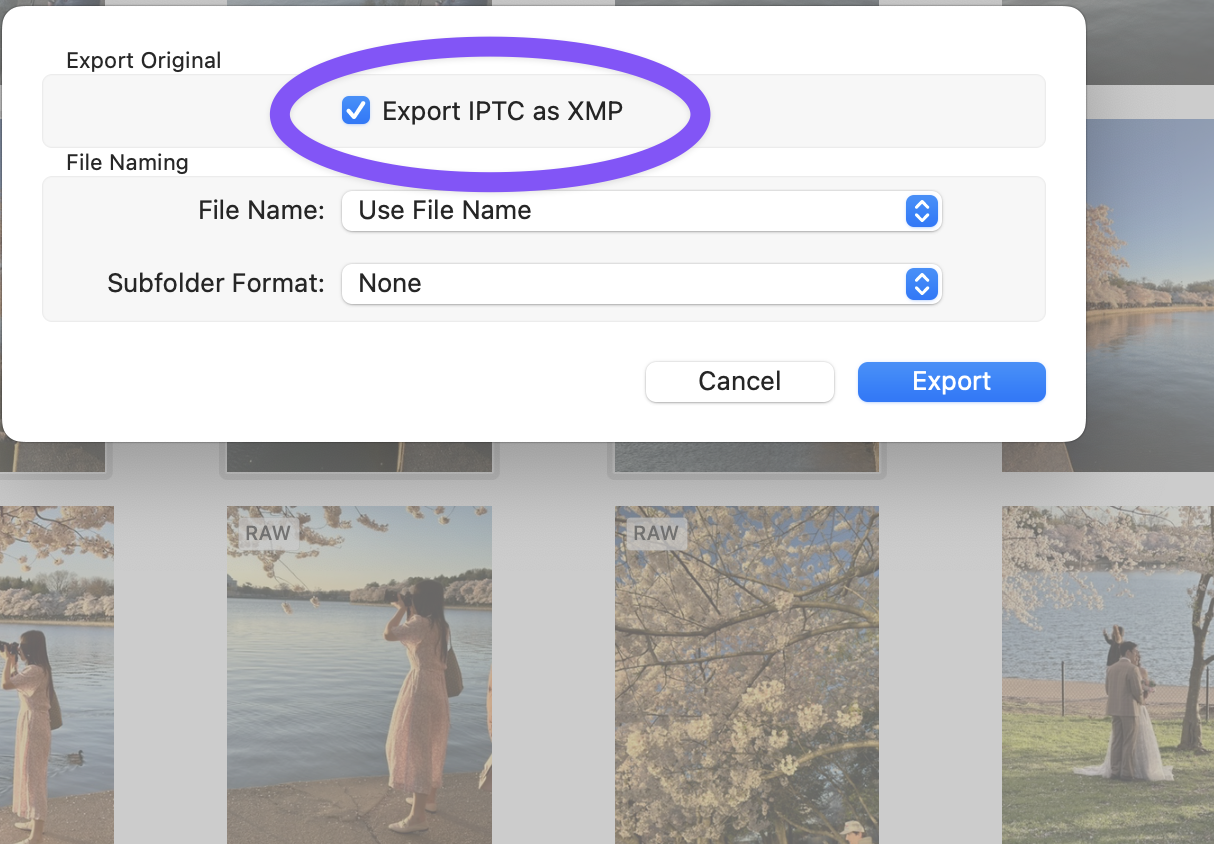
Once you click on Export Unmodified Originals, you will get the dialog below. I would click on Export IPTC as XMP. This will include the time and location information embedded in the photo with your export. Then Click EXPORT
Once you click Export you will see the following.
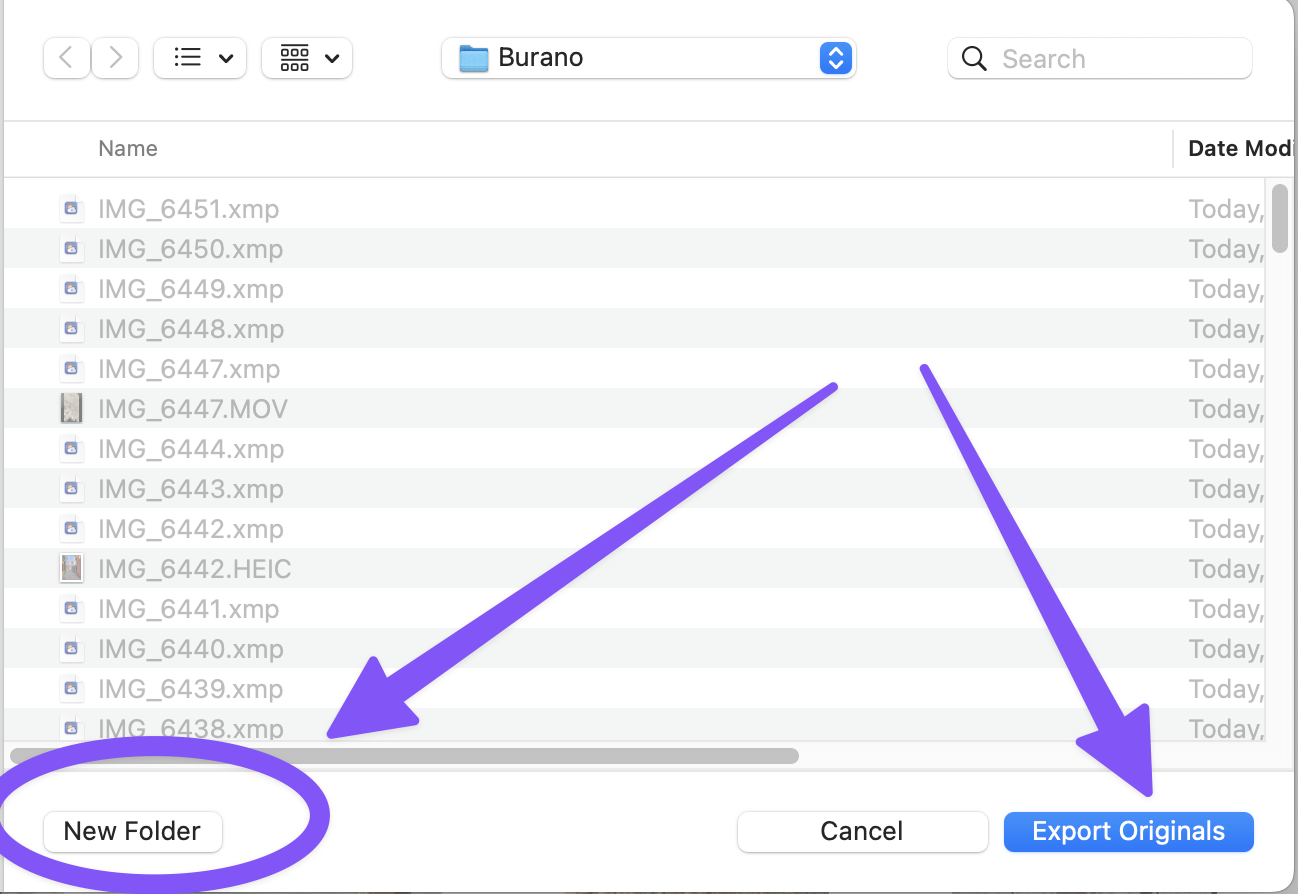
I think putting all the iPhone photos you are exporting into 1 Folder is easier. So, I would click on New Folder and name the folder.

Finally, click on EXPORT ORIGINALS, and you will see a new folder with the iPhone photos on your Desktop (or wherever you choose to save the Folder).
Step 3: Open Lightroom Classic
Open Lightroom Classic and Click on Import just as you usually would import photos. Then click on the New Folder location (mine was on my desktop) you created with the iPhone photos. Import them into Lightroom.
You can now use the Develop module to edit your photos. The other big advantage is that you can keep all your pictures in 1 location.
Let me know if you have any questions. I hope that is helpful.